The Apple Watch is a popular and versatile smartwatch that offers a range of features. One essential aspect of using an Apple Watch is knowing how to locate and use the band release button. This button allows you to easily remove and change your Apple Watch band, allowing for customization and comfort.
Key Takeaways:
- The band release button on the Apple Watch is oval-shaped and located below where the band connects to the watch.
- To remove the band, press and hold the band release button and slide the band out to the side.
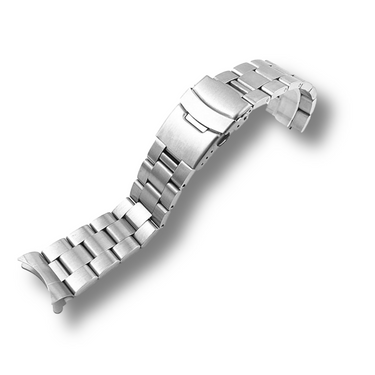
- For link bracelets, you need to separate the links by closing the butterfly closure and pressing the quick release button on the inside of the bracelet.
- Ensure the band is properly locked to prevent sliding by double-checking its positioning.
- Cleaning and maintaining the Apple Watch band is important for its longevity and appearance.
Locating the Band Release Button
The band release button on the Apple Watch is a small oval-shaped button located below where the band connects to the watch. To easily locate it, follow these steps:
- Place your Apple Watch face down on a clean surface.
- Press and hold the band release button, which is oval-shaped and located below where the band connects to the watch.
- While holding the band release button, slide the band out to the side.
It's important to note that if you have a link bracelet, you'll need to follow a slightly different method to remove the band. To remove a link bracelet, perform the following steps:
- Close the butterfly closure on the link bracelet.
- Press and hold the quick release button on the inside of the bracelet.
- While holding the quick release button, pull the links apart to remove the band.
Remember, never force the band into the slot, and always ensure it is properly locked to prevent any sliding.
How to Release the Apple Watch Band
Releasing the Apple Watch band is a simple process that involves pressing and holding the band release button while sliding the band out to the side. To locate the band release button on your Apple Watch, please follow the steps below:
- Place your Apple Watch face down on a clean surface.
- Press and hold the band release button, which is oval-shaped and located below where the band connects to the watch.
- While holding the band release button, slide the band out to the side.
If you have a link bracelet, it is important to separate it before removing it. To do this, follow an alternative method:
- Close the butterfly closure of the link bracelet.
- Press and hold the quick release button on the inside of the bracelet.
- Pull the links apart to remove the band.
It's crucial to remember not to force the band into the slot and ensure it is properly locked to prevent sliding. Following these instructions will ensure a smooth band removal process that won't damage your Apple Watch.
| Apple Watch Band Release Steps |
|---|
| 1. Place the Apple Watch face down on a clean surface. |
| 2. Press and hold the oval-shaped band release button. |
| 3. Slide the band out to the side while holding the band release button. |
| 4. For a link bracelet, close the butterfly closure and press and hold the quick release button on the inside of the bracelet. Pull the links apart to remove the band. |
Alternative Method for Band Removal
If you have a link bracelet, there is an alternative method for removing the band by separating the links through the butterfly closure and quick release button. This method provides a smooth and convenient way to change your Apple Watch band without any hassle.
To begin, close the butterfly closure by aligning the links and pushing them together until you hear a click. Next, locate the quick release button, which is located on the inside of the bracelet near the closure. Press and hold the button firmly with your thumb.
With the button pressed, gently pull the links apart in opposite directions. The quick release mechanism will disengage, allowing you to separate the links and remove the band from your Apple Watch. Make sure to handle the band with care to avoid any damage during the removal process.
| Alternative Method for Band Removal |
|---|
| Close the butterfly closure by aligning the links and pushing them together until you hear a click. |
| Locate the quick release button on the inside of the bracelet near the closure. |
| Press and hold the quick release button firmly with your thumb. |
| Gently pull the links apart in opposite directions to separate them and remove the band from your Apple Watch. |
It is important to note that when attaching a new band to your Apple Watch, make sure it is properly locked to prevent any sliding or accidental detachment. Double-check the positioning of the band and ensure it is securely fastened to the watch. This will ensure a comfortable and secure fit, allowing you to enjoy your Apple Watch without any worries.
Proper Band Locking and Prevention of Sliding
To prevent the Apple Watch band from sliding, it is crucial to ensure that it is properly locked into place. Follow these steps to secure your band and enjoy a comfortable and secure fit.
- Place your Apple Watch face down on a clean surface.
- Locate the band release button, which is oval-shaped and positioned below where the band connects to the watch.
- Press and hold the band release button using your finger or a small tool. This will release the band's mechanism.
- While holding the band release button, slide the band out to the side. This will detach it from the watch.
If you have a link bracelet, an alternative method is required for proper band removal. Start by closing the butterfly closure, then press and hold the quick release button on the inside of the bracelet. As you do so, pull the links apart to separate and remove the band. This method ensures a smooth and seamless band removal process for link bracelets.
After removing or changing your Apple Watch band, ensure that it is properly locked into the slot. Gently slide the band back into place, making sure it fits snugly and securely. You should hear a click or feel a slight resistance when the band is properly locked. Double-check the positioning of the band to avoid any potential sliding or discomfort during wear.
| Steps to Properly Lock Your Apple Watch Band: |
|---|
| 1. Place your Apple Watch face down on a clean surface. |
| 2. Locate the band release button and press and hold it. |
| 3. Slide the band out to the side while holding the band release button. |
| 4. For link bracelets, close the butterfly closure and press and hold the quick release button to separate the links and remove the band. |
| 5. Gently slide the band back into place, ensuring it fits securely and locks with a click or slight resistance. |
Troubleshooting and Common Mistakes
While removing or changing the Apple Watch band is generally straightforward, there can be some common mistakes or issues that users may encounter. It's important to be aware of these potential pitfalls to ensure a smooth band removal process.
Mistake 1: Forcing the Band into the Slot
One common mistake is trying to force the band into the slot without properly aligning it. This can lead to difficulty in removing or adjusting the band. To avoid this, always make sure the band is properly aligned with the band release button before attempting to slide it out.
Mistake 2: Not Properly Locking the Band
Another common mistake is not properly locking the band after attaching it to the watch. If the band is not securely locked, it may slide or come loose, which can be inconvenient and potentially lead to damage or loss of the watch. Double-check that the band is securely locked in place before wearing your Apple Watch.
Mistake 3: Mishandling Link Bracelets
For users with link bracelets, one common mistake is mishandling the removal process. It's important to follow the specific steps for separating the links using the butterfly closure and quick release button. Applying undue force or incorrect techniques can damage the bracelet or the watch itself. Take your time and follow the instructions carefully to ensure a successful band removal.
Remember, if you encounter any difficulties or are unsure about how to remove or change your Apple Watch band, it's always best to consult the user manual or seek assistance from an authorized Apple service provider. By avoiding these common mistakes and following the proper procedures, you can easily remove and change your Apple Watch band whenever needed.
Cleaning and Maintenance of the Apple Watch Band
Proper cleaning and maintenance of the Apple Watch band is essential to ensure its longevity and keep it looking its best. With regular care, you can prevent dirt, sweat, and other residues from accumulating, maintaining the band's appearance and functionality over time.
To clean your Apple Watch band, follow these simple steps:
- Gently remove the band from your Apple Watch.
- Using a soft, lint-free cloth, dampen it with water or a mild detergent solution.
- Wipe the band thoroughly, ensuring to clean both the top and bottom sides.
- For leather or stainless steel bands, you can use a leather cleaner or stainless steel polish, respectively, to maintain their shine and finish.
- Once cleaned, let the band air dry completely before reattaching it to your Apple Watch.
It's important to note that certain types of bands, such as those made of fabric or silicone, may require more frequent cleaning. For fabric bands, you can hand wash them with mild soap and water, while silicone bands can be rinsed under running water. If you're unsure about the cleaning method for your specific band, refer to the manufacturer's guidelines.
Preventing Damage and Wear
In addition to cleaning, proper maintenance of your Apple Watch band involves taking precautions to prevent damage and wear. Here are a few tips to keep in mind:
- Avoid exposing your band to extreme temperatures or prolonged sunlight, as this can cause discoloration or warping.
- Take off your Apple Watch when engaging in activities that could put excessive strain on the band, such as heavy lifting or rigorous sports.
- Avoid contact with harsh chemicals or abrasive surfaces, as they can scratch or degrade the band material.
- If you have a metal band, regularly check for loosened screws or pins and tighten them if necessary.
By following these cleaning and maintenance practices, you can ensure that your Apple Watch band remains in good condition, providing both comfort and style as you go about your daily activities.
Different Types of Apple Watch Bands
Apple offers a wide range of bands for the Apple Watch, allowing users to customize their watch to suit their personal style and preferences. Whether you're looking for something sporty, elegant, or casual, there is a band for everyone. Let's explore some of the different types of Apple Watch bands available:
Sport Bands
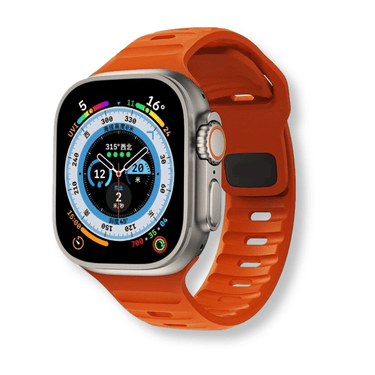
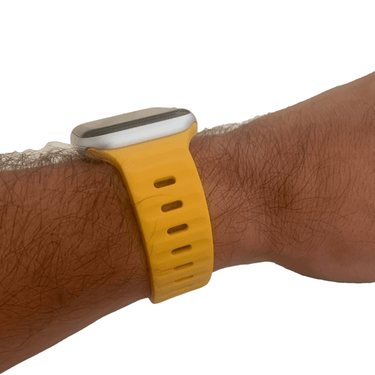
If you lead an active lifestyle, the Sport Bands are perfect for you. Made from a durable and sweat-resistant fluoroelastomer material, these bands are lightweight and comfortable to wear during workouts. They come in a variety of vibrant colors, allowing you to add a pop of personality to your Apple Watch.
Leather Bands
For a more sophisticated look, the Leather Bands are an excellent choice. Crafted from high-quality leather, these bands are not only stylish but also incredibly comfortable. Available in different finishes such as smooth, textured, and vintage, they add a touch of elegance to your wrist.
Metal Bands
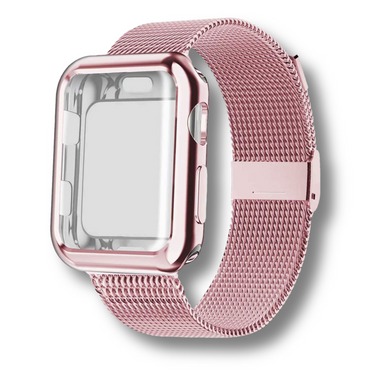
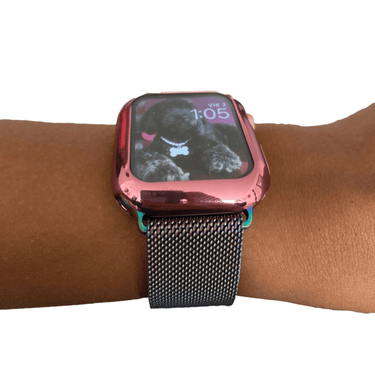
For a sleek and modern aesthetic, the Metal Bands are a great option. Made from stainless steel or titanium, these bands offer durability and a premium feel. They come in various finishes, including classic silver, space black, and gold, allowing you to match your Apple Watch with your personal style.
Nylon Bands
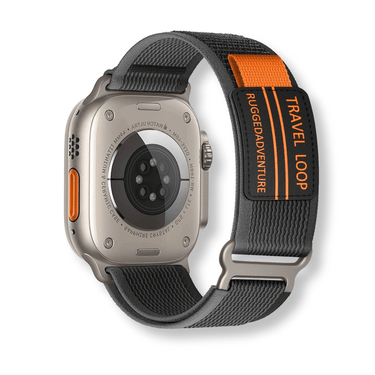
If you prefer a more casual and versatile look, the Nylon Bands are worth considering. Made from a soft and breathable woven fabric, these bands are comfortable to wear all day long. They come in an array of colors and patterns, making it easy to find one that suits your taste.
Whether you're a fitness enthusiast, a fashion-forward individual, or someone who likes to switch up their style, Apple has a band for every occasion. Explore the different options available and find the perfect band to complement your Apple Watch!
| Band Type | Material | Style | Color Options |
|---|---|---|---|
| Sport Bands | Fluoroelastomer | Vibrant and lightweight | Various colors |
| Leather Bands | High-quality leather | Sophisticated and comfortable | Smooth, textured, vintage |
| Metal Bands | Stainless steel or titanium | Sleek and modern | Silver, space black, gold |
| Nylon Bands | Woven fabric | Casual and versatile | Various colors and patterns |
Exploring Additional Band Features and Accessories
In addition to the standard bands, there are various accessories and additional features available for Apple Watch bands that can further enhance your experience. Whether you want to add a touch of personal style or level up your Apple Watch's functionality, these options are worth considering.
One popular accessory is the band adapter, which allows you to use third-party bands with your Apple Watch. These adapters come in different styles and colors, giving you more freedom to customize your watch to match your personality and outfit. With a band adapter, you can easily swap out bands to suit different occasions or moods.
If you prefer to stick with Apple's own band collections, there is a wide range of options to choose from. From sporty to elegant, there are bands available in various materials, including silicone, leather, stainless steel, and woven fabric. Whether you're hitting the gym or attending a formal event, you can find a band that suits your needs and preferences.
Furthermore, third-party manufacturers offer a plethora of band options that cater to different styles and budgets. Whether you're looking for a premium leather band, a trendy nylon strap, or a durable silicone band, you're sure to find something that suits your taste. Just make sure to check the compatibility of the band with your specific Apple Watch model.
| Accessories | Features |
|---|---|
| Band Adapter | Allows you to use third-party bands with your Apple Watch |
| Apple's Own Band Collections | Wide range of options in various materials and styles |
| Third-Party Bands | Offers a plethora of band options from different manufacturers |
Conclusion
Understanding the location and use of the Apple Watch band release button is essential for easy band adjustment and customization. By following the steps outlined in this guide, you can confidently change or remove your Apple Watch band to suit your style and needs.
To locate the band release button on your Apple Watch, follow these steps. Place your Apple Watch face down on a clean surface. Press and hold the band release button, which is oval-shaped and located below where the band connects to the watch. While holding the band release button, slide the band out to the side.
If you have a link bracelet, you need to separate it before removing it. You can also follow an alternative method by closing the butterfly closure, pressing and holding the quick release button on the inside of the bracelet, and pulling the links apart to remove the band. Remember not to force the band into the slot and ensure it is properly locked to prevent sliding.
With this knowledge, you can easily adjust your Apple Watch band to find the perfect fit and style that suits your preferences. Whether you want to switch to a different band for a special occasion or simply clean and maintain your current band, knowing how to release and lock the band is crucial. Enjoy the versatility and personalization that your Apple Watch bands offer by mastering the band release button!
FAQ
Where is the Apple Watch band release button located?
The band release button on your Apple Watch is oval-shaped and located below where the band connects to the watch.
How do I release the Apple Watch band?
To release the Apple Watch band, place your watch face down on a clean surface. Press and hold the band release button, then slide the band out to the side. If you have a link bracelet, you need to separate it before removing it.
Is there an alternative method for band removal?
Yes, if you have a link bracelet, you can close the butterfly closure, press and hold the quick release button on the inside of the bracelet, and pull the links apart to remove the band.
How can I ensure the band is properly locked to prevent sliding?
When placing the band back onto your Apple Watch, make sure to align it properly and slide it into the slot until you hear a click. This will ensure a secure lock and prevent the band from sliding.
What should I do if the band does not come out easily?
If the band does not come out easily, avoid forcing it. Double-check that you are pressing the band release button correctly and try again. If the issue persists, reach out to Apple support for assistance.
How should I clean and maintain my Apple Watch band?
The cleaning method will vary depending on the type of band you have. For silicone or fabric bands, you can wash them with water and mild soap. Metal bands can be wiped clean with a soft, damp cloth. Leather bands should be treated with leather cleaner or conditioner. Regular maintenance and cleaning will help prolong the lifespan of your band.


