- Locate the two release buttons on the back of the Apple Watch casing.
- Slide the band horizontally to remove it; never pull it outward.
- Ensure the metal middle lug piece faces the inside of your wrist during installation.
- Apple Watch bands are cross-compatible between specific case sizes (e.g., 42mm, 44mm, 45mm, and 49mm).
- Always listen for the "click" to confirm the band is securely locked in place.
- Model-specific bands like the Solo Loop require correct sizing, not just lug compatibility.

- What should you do before changing your Apple Watch band?
- How to remove Apple Watch band safely?
- How to install your new Apple Watch strap replacement?
- Band type-specific installation tips
- Model-specific instructions by Apple Watch series
- Are all Apple Watch bands compatible with every model?
- Troubleshooting: band release issues and common problems
- Why is my Apple Watch band stuck and how do I fix it?
- How to clean your Apple Watch during a band replacement?
- How often to change your band and maintenance tips
- When is it time for an Apple Watch band replacement?
- Frequently Asked Questions
What should you do before changing your Apple Watch band?
Before you dive into the process of learning how to change apple watch band, it is essential to prepare your workspace. While the mechanism is designed for ease of use, the Apple Watch is a precision instrument made of glass and aluminum or stainless steel. To avoid accidental scratches or drops, place your watch face-down on a clean, soft surface. A microfiber cloth, a mousepad, or even a soft lint-free towel works perfectly. This ensures that while you are applying pressure to the release buttons, the screen remains protected from any grit or hard surfaces on your table.
Additionally, ensure your hands are clean and dry. Oils from your skin or moisture can make the band slippery, making it harder to get a firm grip on the apple watch strap. If you are replacing a sport band that has been through a workout, you might want to give the watch casing a quick wipe down first. Having your new Apple Watch bands ready and unboxed will also make the transition smoother. Take a moment to inspect the new band for any defects in the lugs -- the small metal pieces that slide into the watch -- to ensure a secure fit once installed. Being organized prevents the frustration of searching for parts while your watch is vulnerable.
It is also worth knowing which size band you need before you begin. Apple uses a two-category system: "Small" (38mm, 40mm, 41mm) and "Large" (42mm, 44mm, 45mm, 49mm Ultra). If you are unsure which size your Apple Watch is, flip it over -- the case size is engraved on the back casing alongside the model number. Having this information handy means you can double-check your new band before you start the swap.
How to remove Apple Watch band safely?
Understanding how to remove apple watch band is the most critical step to prevent damaging the internal locking mechanism. On the back of your Apple Watch, you will find two small, oblong buttons located right where the strap meets the metal casing. These are the band release buttons. To remove the strap, you must press and hold one of these buttons down firmly with your fingernail or a soft tool. While holding the button, slide the band horizontally to the left or right. It should glide out of the channel with minimal resistance.

If you are struggling with a Link Bracelet, the process is slightly different. You must first separate the link bracelet into two pieces by pressing the quick-release button on one of the links. Once the band is in two pieces, you can proceed to hold the release button on the watch casing and slide the lugs out. It is important never to force the band. If it isn't moving, ensure you are pressing the release button fully. Forcing an apple watch strap without the button being engaged can strip the locking pin, which might lead to your watch falling off your wrist later. Once both sides are removed, your watch casing is ready for a fresh look with a new sport watch band or a classic leather option.
How to install your new Apple Watch strap replacement?
Once you have successfully removed the old strap, performing an apple watch band replacement is a satisfyingly simple task. Take your new strap and identify the side that faces the watch. Most Apple Watch bands have three metal lugs on the connector; the middle one is usually a different color (often silver or black) and should face the back of the watch (your skin). Hold the band at a slight angle and slide it into the slot from the side. You do not need to press the release buttons when installing a new band; the mechanism is designed to click into place automatically.
As you slide the band in, listen and feel for a distinct "click." This sound indicates that the spring-loaded pin has successfully engaged with the notch in the watch casing. Once you hear it, give the band a gentle tug to ensure it is locked. If the band slides freely back and forth, it is not secure. This usually happens if the band is upside down or if the lug is stuck. If you've chosen a premium leather Apple Watch band, the fit might feel slightly tighter initially compared to silicone, but the sliding motion remains the same. Always double-check the security of the connection before putting the watch on your wrist to avoid expensive accidents.
Band type-specific installation tips
Not all Apple Watch bands install the same way. While the lug mechanism is universal, different band styles have unique characteristics that affect how you size, install, and wear them. Here's what you need to know for each major type.
Solo Loop and Braided Solo Loop
The Solo Loop and Braided Solo Loop are Apple's most elegant band designs -- and the trickiest to get right, because there is no buckle, clasp, or adjustment point. The entire band is one seamless loop of silicone or braided yarn. This means that sizing is critical. Apple provides a printable sizing guide online, but the easiest approach is to use a flexible tape measure around your wrist while holding it where the watch normally sits. The band should slide over your hand without stretching excessively, yet fit snugly on your wrist without pinching.
Installation is straightforward: the band snaps into the lug slots just like any other. However, if your Solo Loop feels too loose or too tight after wearing it for a day, return or exchange for the correct size -- there is no adjustment possible. Explore our silicone Apple Watch bands for similar seamless-style options at a range of prices.
Sport Loop (double-pin hook-and-loop closure)
The Sport Loop uses a hook-and-loop (velcro-style) fastener that threads through a keeper. To install: attach the lug end to the bottom of the watch (6 o'clock side), then thread the long tail through the keeper on the shorter section. Pull to your preferred tightness and press the hook-and-loop section together. The Sport Loop is one of the lightest and most breathable options available, making it ideal for workouts. When removing, simply peel the fastener open -- no sliding required on the band itself, only on the lug.
Link Bracelet (tool-free adjustment)
Modern Apple Link Bracelets and many third-party metal link bands feature quick-release links that let you remove individual links without any tools. Simply press the butterfly clasp on each link to remove or add links for sizing. When installing onto the watch, split the bracelet at the quick-release point into two halves, slide each half into the lug channel, and listen for the click. The two halves then connect at the butterfly clasp on your wrist. If you prefer the premium metal look, browse our Apple Watch metal band collection for stainless steel and titanium options.
Leather Link and Modern Buckle
Leather Link bands use a series of small magnetic connectors that snap together, making length adjustment seamless -- just fold or unfold links. Installation into the watch casing is standard (slide, click). The Modern Buckle is a compact band with a polished metal clasp; it installs in two pieces (top and bottom halves) and connects with a pin. When putting on, thread the pin through your preferred hole and fold the clasp closed. Leather bands benefit from an occasional treatment with leather conditioner, especially after sweaty activities.
Third-party bands -- common fit issues
Third-party Apple Watch bands vary widely in quality. The most common fit issue is a lug connector that is slightly too wide or too narrow, causing the band to wobble side-to-side or resist the click. Always ensure you are buying from a reputable seller that specifies exact lug width compatibility. A properly engineered third-party band will click just as securely as an Apple OEM band. If a band clicks but still wobbles significantly, the lug tolerances are too loose -- this is a safety concern, not just an aesthetic one.
Model-specific instructions by Apple Watch series
While the core band-change mechanism is the same across all Apple Watch models, different series have subtle differences in case thickness, lug spacing, and supported band styles that are worth knowing.
Apple Watch Series 10 (41mm / 45mm)
The Apple Watch Series 10 is Apple's thinnest watch to date, with a refined aluminum or titanium case. The band lug mechanism is unchanged from previous generations, so any 40/41mm or 44/45mm band is fully compatible. However, because the case is so slim, very thick aftermarket lug connectors may not sit flush -- pay attention to lug thickness when purchasing third-party bands. The Series 10 introduced a new titanium finish option, so if you want your band to match the case color, look for "titanium-tone" hardware on straps. For the full list of compatible styles, see our Apple Watch Series 10/11 bands collection. You can also explore the dedicated Apple Watch Series 10 band size and fit guide for detailed recommendations.
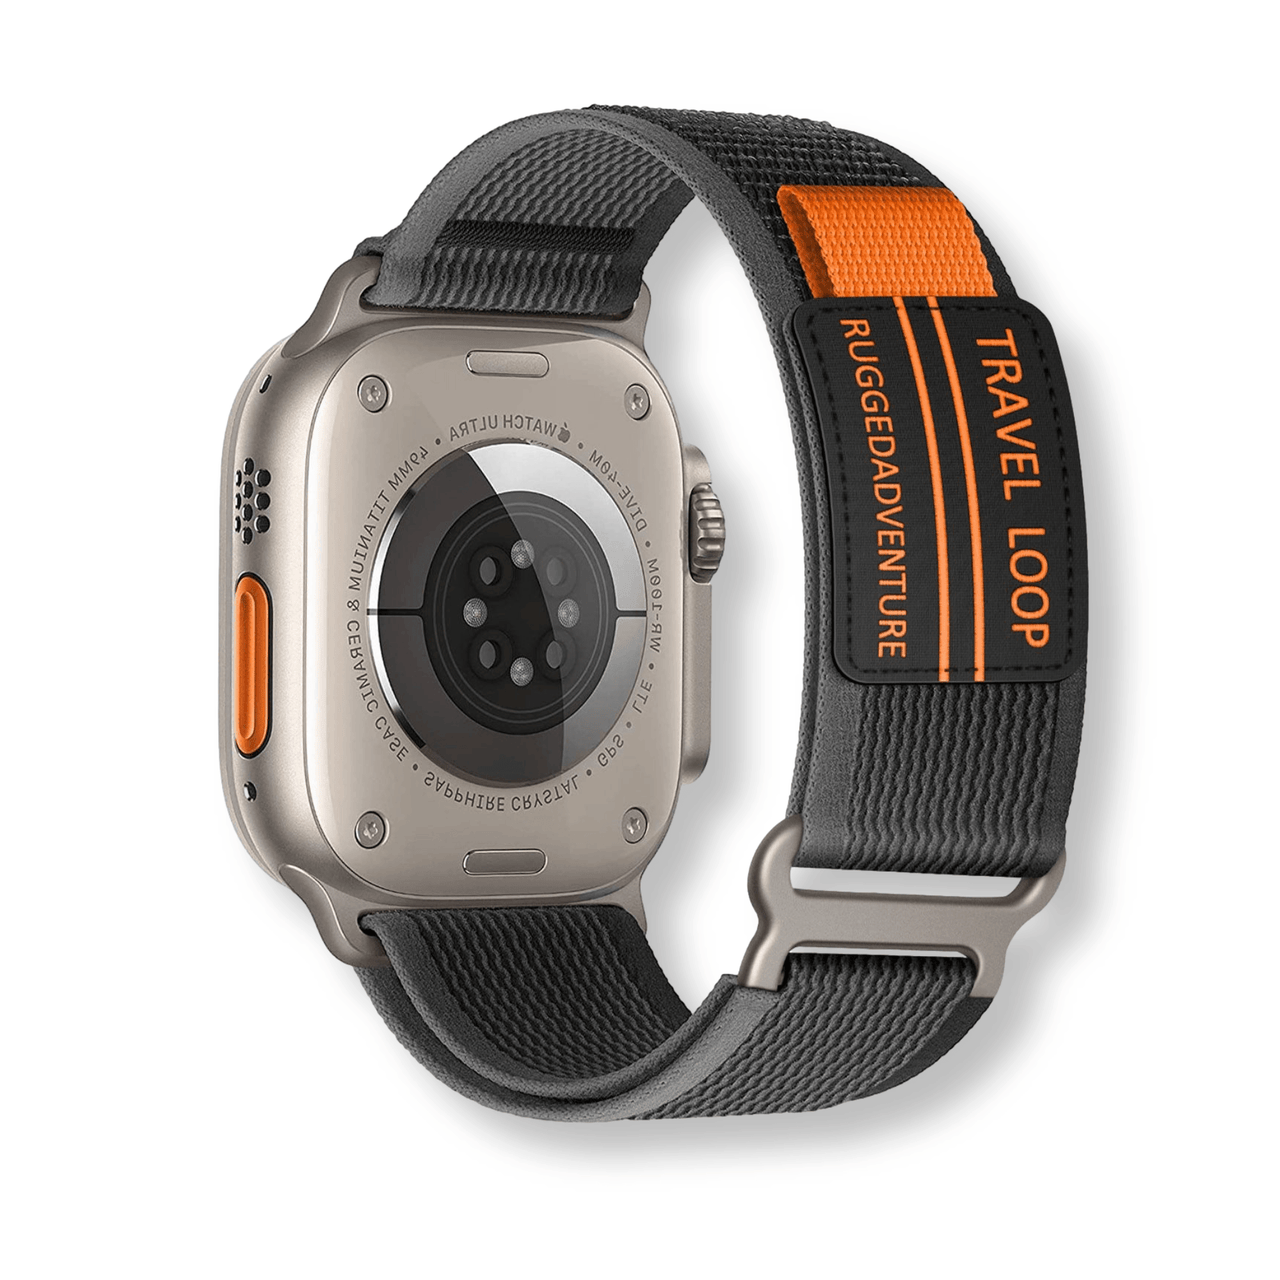
Apple Watch Ultra 2 (49mm)
The Apple Watch Ultra 2 uses the same "Large" lug size as the 42mm–45mm series, meaning most large-size bands physically attach. However, the Ultra's case is significantly thicker (14.4mm) and wider than standard models, so bands that sit right against the case edges -- like certain metal bracelets -- may not clear the protruding case corners cleanly. Apple designed three bands specifically for the Ultra: the Alpine Loop, Trail Loop, and Ocean Band.
- Alpine Loop: A premium woven textile loop with a G-hook closure. Install the lug end into the bottom slot of the watch, wrap around the wrist, and hook the G-hook through the loop at your preferred tightness. The G-hook is much more secure during high-activity sports than a standard clasp.
- Trail Loop: A lightweight double-layer band with a tab-and-loop adjustment system. It installs like a standard Sport Loop but has a unique double-pin tab that tucks into a keeper for an ultra-secure fit during runs or hikes.
- Ocean Band: A high-stretch fluoroelastomer band designed for diving and watersports. It has an extender included to wear over a wetsuit. The Ocean Band's lug is slightly thicker than standard sport bands, so remove it carefully to avoid scratching the titanium case.
For Ultra owners looking beyond Apple's lineup, our Apple Watch Ultra 2 bands compatibility guide covers which third-party bands work best with the 49mm case.
Apple Watch SE (2nd generation)
The Apple Watch SE (2nd gen) comes in 40mm and 44mm sizes and uses the same standard lug as all other Apple Watch models in its respective size group. Because the SE is Apple's most affordable watch, many owners look for cost-effective band options as well. Good news: every band compatible with the 40mm Series 4–10 fits the 40mm SE, and the same goes for the 44mm size. This means you have access to the full range of Apple Watch straps -- from budget silicone options to premium leather -- without any compatibility concerns. The SE does not support Ultra-specific bands, which are designed for the larger 49mm case profile.
Apple Watch Series 9 and older models -- backward compatibility
One of Apple's most user-friendly decisions is maintaining band compatibility across many generations. Here is a quick backward compatibility reference:
- 38mm (Series 0–3): Compatible with 40mm (Series 4–6) and 41mm (Series 7–10) bands, and vice versa.
- 42mm (Series 0–3): Compatible with 44mm (Series 4–6) and 45mm (Series 7–10) bands, and vice versa.
- Series 9 (41mm or 45mm): Fully compatible with all bands labeled for 41mm/45mm or the older 40mm/44mm equivalents.
Are all Apple Watch bands compatible with every model?
One of the best features of the Apple ecosystem is the long-term compatibility of its accessories. When considering an apple watch band replacement, you generally only need to know if your watch is "Small" or "Large." The smaller category includes the 38mm, 40mm, and 41mm models. The larger category includes the 42mm, 44mm, 45mm, and the 49mm Apple Watch Ultra. Generally, any band designed for a 38mm watch will fit a 41mm Series 9, and any band designed for a 42mm watch will fit the 49mm Ultra.

However, while they fit, the aesthetic might vary slightly. For example, a band designed specifically for the 41mm model might look a bit narrow when used on the older 38mm casing, though the connector will lock perfectly. The Apple Watch Ultra is the only slight outlier; while it uses the "Large" connector size, its rugged design means that some older metal Apple Watch bands might not sit perfectly flush against its titanium edges. When shopping at Watchband.direct, we clearly label our collections to ensure you get the perfect match for your specific case size, ensuring that your apple watch strap looks as good as it functions.
Troubleshooting: band release issues and common problems
Even with a tool-free design, things can go wrong. Here are the most common Apple Watch band problems and how to solve them without risking damage to your watch.
Band release button not working
If you press the release button and nothing happens -- the button doesn't depress or feels completely rigid -- this is almost always caused by one of two things: debris blocking the button, or a band that is incorrectly seated and preventing button travel. Start by blowing compressed air around the button area to dislodge any particles. If the button feels springy but the band still won't release, try pressing it with the flat pad of your finger rather than a fingernail, applying pressure directly into the button rather than at an angle. On very rare occasions, a manufacturing defect can cause a stuck release button -- if neither approach works after cleaning, contact Apple Support.
Band stuck or jammed
This is the most common issue, especially on watches that haven't had a band change in months or years. Sweat residue, sunscreen, and skin oils build up in the lug channel and essentially glue the band in place. The fix: apply a small amount of isopropyl alcohol (70%) on a cotton swab around the lug joint. Wait 60 seconds, then press the release button and wiggle the band laterally while applying gentle outward pressure. Do not yank. Repeat if necessary. In stubborn cases, a wooden toothpick can help clear visible grime from the gap before retrying. See the detailed section below for more on stuck bands.
New band won't click in
If your new band slides into the channel but won't click -- or clicks but immediately slides back out -- check these things in order:
- Is the band the right size? A 41mm band will not click properly into a 45mm watch.
- Is the lug oriented correctly? The flat side of the lug (with the spring pin visible) should face outward. The engraved or colored middle section faces the watch back.
- Is the lug fully inserted? You may need to push slightly harder than expected on the first install -- particularly with higher-quality, tighter-tolerance bands. Push from the outer edge of the band, not the watch face side.
- Is there a lug protector on the band? Some bands ship with a small plastic film on the lug connector. Remove it before installation.
Band feels loose after install
A correctly installed band should have zero lateral play in the lug channel. If you can slide the band left and right after it has clicked in, the spring pin is not fully engaged. Remove the band completely and reinsert it, making sure to push until you hear and feel a solid click from both the top and bottom bands (install one side at a time). If looseness persists with a specific third-party band, the lug diameter may be undersized -- this is a quality issue with that band, not your watch. Invest in a band with proper Apple-spec lug tolerances.
Why is my Apple Watch band stuck and how do I fix it?
Sometimes, when you try to figure out how to remove apple watch band, you might find that the strap simply won't budge. This is a common issue caused by the buildup of sweat, salt, dust, or lotions inside the lug channel. Over time, these particles can act like a mild adhesive, jamming the spring-loaded locking pin. If your band is stuck, do not use pliers or metal tools, as these will permanently mar the finish of your watch. Instead, try using a small amount of warm water or a drop of isopropyl alcohol on a cotton swab around the lug area to dissolve the debris.
After applying the liquid, let it sit for a minute, then press the release button and gently wiggle the band back and forth while sliding. In most cases, this "wiggle and slide" technique will break the seal of the grime. If it is still stuck, you can try using a wooden toothpick to gently clear out any visible dirt from the gaps. Regular maintenance and occasionally removing your apple watch strap to clean the channels can prevent this issue from occurring. If you are replacing an old, grimy band, consider upgrading to a breathable silicone or rubber watch band, which tends to trap less debris against the casing.
How to clean your Apple Watch during a band replacement?
Changing your band is the perfect opportunity to perform a deep clean of your device. When the apple watch strap is removed, you gain access to the lug channels and the areas of the casing that are usually hidden. These spots are notorious for collecting dead skin cells and dried sweat. Use a damp, lint-free cloth to wipe out the channels. You can also use a soft-bristled toothbrush to gently scrub the speaker ports and the digital crown. Since the band is off, you can also easily clean the heart rate sensor on the back without the strap getting in the way.

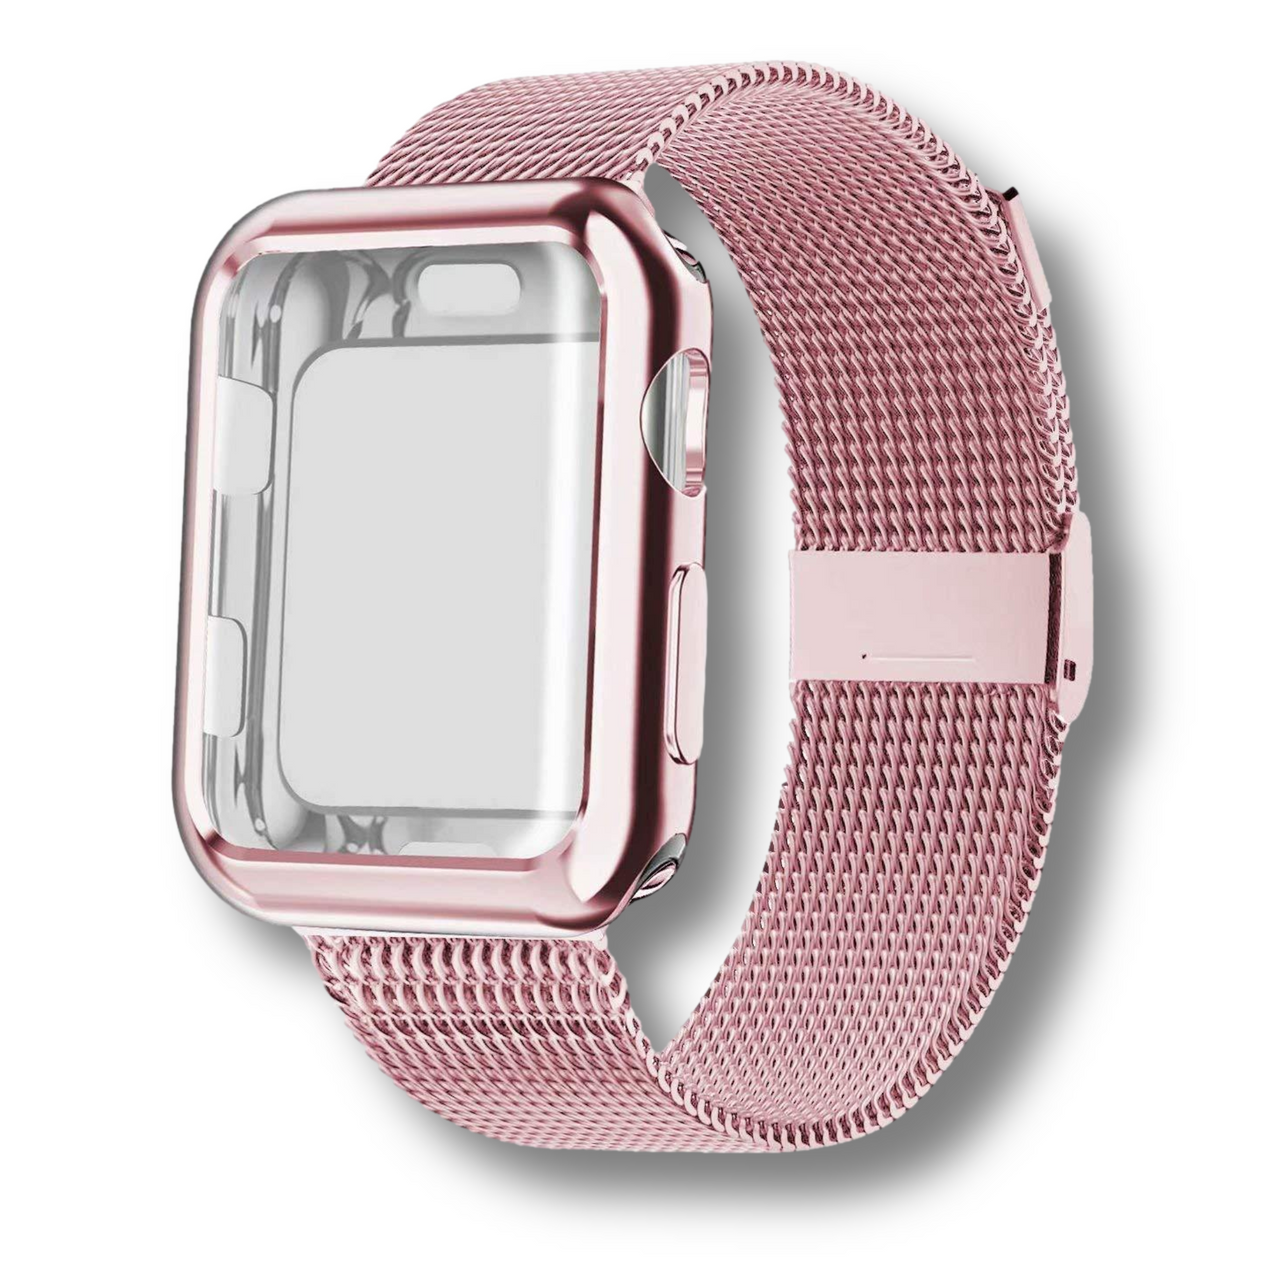
Cleaning the watch not only keeps it looking new but also ensures that the sensors maintain accurate readings. If you are switching to a high-end apple watch band replacement, such as a stainless steel link or a Milanese loop, you want the watch casing to match the pristine look of the new strap. Avoid using harsh chemicals or abrasive cleaners, as these can strip the oleophobic coating off the screen. A simple mixture of water and a tiny bit of mild soap is usually all you need to restore the shine to your Apple Watch before sliding in your new favorite band.
Don't forget to clean the band you removed as well, especially if you plan to rotate it back into use later. Sport bands can be rinsed under warm water and patted dry. Leather bands should only be wiped with a slightly damp cloth -- never submerged -- and then conditioned with a leather-safe product. Metal bands can be soaked in warm soapy water and scrubbed with a soft brush to get into the links.
How often to change your band and maintenance tips
There is no single correct answer for how often you should change your Apple Watch band -- it depends heavily on your activity level, band material, and personal preference. However, here are some practical guidelines based on usage patterns:
- Daily active users (gym, running, cycling): Rotate between a dedicated workout band (silicone or nylon) and a lifestyle band for the rest of the day. This significantly extends the life of both bands and prevents odor buildup on your nicer straps.
- Office or casual wear: A full band change every 3–6 months is reasonable for visual freshness, even if the band shows no visible wear.
- Material-specific timelines: Silicone bands last 2–3 years before degrading. Leather bands may need replacement after 12–18 months of daily use. Metal bands can last indefinitely with proper care.
For ongoing maintenance between full band changes:
- Wipe down silicone and nylon bands after every workout with a damp cloth.
- Remove any band weekly to clean the lug channels -- this prevents the stuck-band problem entirely.
- Store bands not in use lying flat or on a band organizer, not curled or compressed, which can deform some materials over time.
- Rotate through multiple bands to reduce wear on any single strap and to match your outfit or activity.
If you're building a band rotation, a good starting point is one sporty band (silicone or nylon), one casual band (woven or braided), and one dress band (leather or metal). This covers nearly every occasion. Browse our curated picks in the best Apple Watch bands guide for 2026 to find options for each category.
When is it time for an Apple Watch band replacement?
Knowing how to change apple watch band is useful, but knowing when to do it is just as important for the safety of your device. Silicone bands can develop "shiny" spots or micro-tears over time, especially near the lug or the pin-and-tuck closure. If you notice the material thinning or losing its elasticity, it's time for a replacement. Leather bands will naturally patina, but if the stitching begins to fray or the leather becomes brittle, the structural integrity is compromised. Metal bands should be checked for loose pins or failing clasps.
Beyond wear and tear, many users opt for an apple watch strap change based on their daily activity. You wouldn't wear a leather dress shoe to the gym, and the same logic applies to your watch. Switching to a silicone or nylon strap for workouts preserves your nicer bands and prevents odors. Conversely, swapping a sweat-stained gym band for a sleek metal or leather option for a dinner date elevates your entire look. With the ease of the Apple Watch switching mechanism, there is no reason to stick with just one style.
There is also a safety dimension to worn bands that is easy to overlook. A band with a cracked lug connector, a failing buckle pin, or a degraded pin-and-tuck loop presents a real risk of your watch coming loose from your wrist unexpectedly. Given that Apple Watches often contain payment data and personal health information, a lost device is more than just an inconvenience. Inspect your band's mechanical parts -- buckle pin, lug connectors, clasps -- every time you clean the watch. Replacement is far cheaper than replacing the watch itself.
Frequently Asked Questions
Can I use a 45mm band on a 41mm watch?
Technically, the lug will slide in, but it will overlap the edges of the watch casing, which looks bulky and may catch on clothing. It is best to match the band size to your specific watch category (Small vs. Large).
Which side of the Apple Watch band faces up?
The side with the small metal middle lug (usually silver or black) should face the back of the watch. If you have a band with a buckle, the buckle part usually attaches to the top of the watch casing (the 12 o'clock side).
Do I need any special tools to change the band?
No, the Apple Watch is designed for tool-free band changes. You only need your fingers to press the release buttons on the back of the watch casing.
Will Apple Watch Ultra bands fit the Series 9 or Series 10?
Yes, Apple Watch Ultra bands (49mm) use the "Large" lug size, which is the same as the 42mm, 44mm, and 45mm series. The Alpine Loop, Trail Loop, and Ocean Band will physically attach to Series 9 and Series 10 45mm watches. However, these bands are designed for the larger case proportions of the Ultra, so they may look slightly oversized on slimmer models.
How often should I clean my watch band?
If you wear your watch daily, it is recommended to wipe down the band once a week and perform a deeper clean of the lug channels every time you perform an apple watch band replacement. Active users should wipe sport bands after every session.
Are third-party Apple Watch bands safe to use?
Yes, as long as you purchase from reputable sellers that use correct lug specifications. A well-made third-party band is mechanically indistinguishable from an Apple OEM band. Our entire Apple Watch band collection at Watchband.direct is engineered to Apple's lug specifications for a secure, rattle-free fit.
Can I change the band on a waterproof Apple Watch without affecting its water resistance?
Yes. The water resistance of your Apple Watch (rated IP6X dust resistance and WR50 water resistance on most models) is a property of the watch case itself, not the band. Changing the band does not affect the watch's water resistance rating. However, Apple recommends checking the watch for any damage after a band change before swimming with it.
Ready to refresh your look? Explore our premium collection of Apple Watch bands at Watchband.direct. From rugged sports straps to elegant leather, we have the perfect replacement for every style and occasion. Shop now and give your watch the upgrade it deserves!
📌 Series 10 & 11 Compatibility Guide
For the full sizing chart and top picks for the latest Apple Watch models, see our Apple Watch Series 10 Bands: Complete Size, Fit & Style Guide 2026.
📌 Apple Watch Ultra 2 Band Guide
Wearing the Ultra? Read our Apple Watch Ultra 2 Bands: Complete Size, Fit & Compatibility Guide for Alpine Loop, Trail Loop, and top third-party options.
Related Guide: Apple Watch Bands: Complete Compatibility & Size Guide (2026)
📌 Complete Guide
For the full guide, see our Stainless Steel Watch Bands Complete Guide.