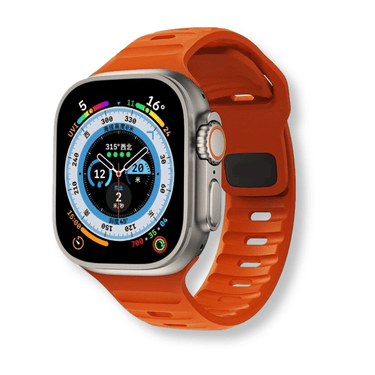
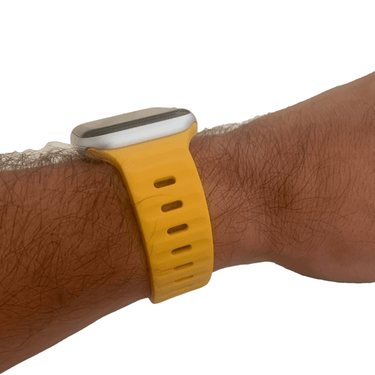
Are you looking to adjust your watch band for a better fit? Follow our simple guide on how to take links out of a watch band easily. Removing links from a watch band is a simple process that can be done at home with the right tools. First, measure your wrist and determine how many links to remove. Gather the necessary tools, including a pin pusher, pliers, mallet, and screwdriver. Use the pin pusher or screwdriver to remove the pins holding the links together. Be careful not to lose any small metal ferrules that may fall out during the process. Continue removing links until you have achieved the desired fit. Reassemble the watch band by reconnecting the links and inserting the pins back into place. Make sure the clasp is facing the correct way and replace any spring bars that were removed. Finally, test the fit of the watch and adjust as needed.
Key Takeaways:
- Removing links from a watch band is a simple process that can be done at home.
- Ensure you have the necessary tools before starting the adjustment process.
- Be careful not to lose any small metal ferrules during the link removal process.
- Reassemble the watch band correctly and test the fit before wearing.
- Adjust the links as needed to achieve the perfect fit for your wrist.
Tools Needed for Removing Watch Band Links
To successfully remove links from your watch band, you'll need a few essential tools. Let's take a look at what you'll need:
- A pin pusher: This handy tool will allow you to easily remove the pins holding the links together. Choose a pin pusher with a small, pointed tip that can fit into the pinholes of your watch band.
- Pliers: Opt for a pair of needle-nose pliers to provide you with a firm grip when handling the pins and links. They will allow you to have better control during the removal process.
- A mallet: A soft mallet is useful for gently tapping the pin pusher, aiding in the removal of the pins. Make sure to use a rubber or nylon mallet to avoid damaging your watch band.
- A screwdriver: In some cases, screws may be used instead of pins to hold the links together. If your watch band has screws, you'll need a small screwdriver to unscrew them.
The above tools are essential for a successful link removal process. It's important to gather them before you begin, as they will make the adjustment process easier and more efficient.
Table: Essential Tools for Removing Watch Band Links
| Tool | Description |
|---|---|
| Pin pusher | A small, pointed tool used to remove pins from the watch band. |
| Pliers | Needle-nose pliers for a firm grip and better control during pin removal. |
| Mallet | A soft mallet, such as a rubber or nylon one, for gently tapping the pin pusher. |
| Screwdriver | A small screwdriver for unscrewing links held together by screws. |
With these tools in hand, you're ready to embark on the journey of adjusting your watch band for a perfect fit. In the next section, we will provide a step-by-step guide on how to remove links from your watch band, ensuring you achieve the desired fit for your timepiece.
Step-by-Step Guide to Removing Watch Band Links
Removing links from a watch band may seem daunting, but with our step-by-step guide, you'll be able to do it easily. Follow these instructions to achieve the perfect fit for your timepiece.
Tools Needed
Before you begin, gather the necessary tools:
- A pin pusher or screwdriver
- Pliers
- A mallet
- A small container for holding the pins and ferrules
Having these tools ready will ensure a smooth and hassle-free adjustment process.
1. Measure your wrist
Start by measuring your wrist to determine how many links to remove. Use a measuring tape or a piece of string to get an accurate measurement.
2. Remove the pins
Using the pin pusher or screwdriver, carefully push out the pins that hold the links together. Take caution not to lose any small metal ferrules that may fall out during this process. Keep them in a safe place.
3. Adjust the watch band
Continue removing links until you have achieved the desired fit. Take your time and make sure to remove an equal number of links from each side of the watch band to maintain symmetry.
4. Reassemble the watch band
Once you have made the necessary adjustments, it's time to reassemble the watch band. Carefully reconnect the links and insert the pins back into place. Ensure that the clasp is facing the correct way and replace any spring bars that were removed.
5. Test the fit
Finally, test the fit of your adjusted watch band. Put it on your wrist and check if it feels comfortable and secure. If further adjustments are needed, repeat the process until you achieve the perfect fit.
| Tools Needed | Steps |
|---|---|
| Pin pusher or screwdriver | 1. Remove the pins |
| Pliers | 2. Adjust the watch band |
| Mallet | 3. Reassemble the watch band |
| Small container for pins and ferrules | 4. Test the fit |
Reassembling and Testing Your Adjusted Watch Band
Now that you've removed the excess links, it's time to put everything back together and make sure the watch fits just right. Reassembling your watch band may seem daunting at first, but with the right tools and a little patience, you'll have it back in working order in no time.
Start by carefully aligning the remaining links in the correct order, ensuring that they are facing the right way. This will help maintain the overall aesthetic of the watch band. Insert the pins back into the holes, making sure they go through both ends of each link. You may need to lightly tap the pins with a mallet to secure them in place.
Next, check that the clasp is facing the correct way. It should align with the direction of your wrist when the watch is worn. If necessary, adjust the clasp by removing any spring bars that were detached during the process. Reattach the spring bars securely, ensuring they are inserted into their respective holes on the clasp and watch band.
Once you've reassembled the watch band, give it a test run. Fasten the clasp and wear the watch to check the fit. Pay attention to any discomfort or tightness. If the watch feels too loose, you may need to remove an additional link. Conversely, if it feels too tight, you might need to add a link back in.
Finally, it's important to ensure that the watch is securely fastened to your wrist. Gently shake your arm, being careful not to drop the watch, and see if it stays in place. If it slides around or feels unstable, adjustments may be needed. Continue this process until you achieve the perfect fit, allowing you to confidently wear your watch without any discomfort.
| Reassembling and Testing Your Adjusted Watch Band |
|---|
| 1. Align remaining links in the correct order, ensuring they are facing the right way. |
| 2. Insert pins back into the holes, tapping lightly with a mallet if needed. |
| 3. Check that the clasp is facing the correct way and adjust if necessary. |
| 4. Reattach any detached spring bars securely. |
| 5. Fasten the clasp and wear the watch to test the fit. |
| 6. Shake your arm gently to ensure the watch stays in place. |
Conclusion
Taking links out of a watch band may require some patience and attention to detail, but with our guide, you'll be able to adjust your timepiece easily and achieve a perfect fit.
First, measure your wrist and determine how many links to remove. This will ensure a comfortable and secure fit. Once you have the right measurement, gather the necessary tools, including a pin pusher, pliers, mallet, and screwdriver.
Using the pin pusher or screwdriver, carefully remove the pins holding the links together. Take care not to lose any small metal ferrules that may fall out during the process. Continue removing links until you have achieved the desired fit.
After removing the necessary links, it's time to reassemble the watch band. Reconnect the links and insert the pins back into place. Ensure that the clasp is facing the correct way and replace any spring bars that were removed.
Finally, test the fit of the watch band on your wrist. If needed, make further adjustments until you achieve the perfect fit. With our step-by-step guide, you can confidently take links out of your watch band and enjoy a timepiece that fits comfortably and looks stylish.
FAQ
How many links should I remove from my watch band?
The number of links you should remove depends on the size of your wrist. Measure your wrist and determine how loose or snug you want the watch to fit. It's recommended to remove an equal number of links from each side to maintain balance.
What tools do I need to remove links from a watch band?
To remove links from a watch band, you'll need a pin pusher, pliers, mallet, and a screwdriver. These tools will help you disassemble the links and adjust the size of the band.
How do I remove the pins holding the links together?
Use a pin pusher or screwdriver to carefully push out the pins holding the links together. Be gentle and ensure you don't lose any small metal ferrules that may fall out during the process.
How do I reassemble the watch band after removing the links?
To reassemble the watch band, reconnect the links by lining up the holes and inserting the pins back into place. Make sure the clasp is facing the correct way and replace any spring bars that were removed.
How can I test the fit of the watch band after adjusting it?
After reassembling the watch band, put it on your wrist and test the fit. Ensure it's not too tight or too loose. If further adjustment is needed, repeat the process of removing or adding links until you achieve the desired fit.


